

")
Ever felt like your floral installations aren’t loose and flowy? Have you ever wondered how to make soft, airy installations that are full of dimension and romance? When I first started out in the world of floral design, I definitely struggled to figure this out. But after years of working for quite a few different floral companies, watching other designers and figuring out lots of different styles, I finally learned a few tricks that are really effective in creating beautiful dimension in my large scale pieces.
Why Soft & Airy?
First of all – let’s talk about what creating more airy designs can do for your business. In today’s wedding industry, I find that more and more couples are gravitating towards a more timeless look. People love an organic, gestural design, and less of that clean, stiff, ballroom look. There is something about a flowy, garden-inspired installation that mimics the naturally occurring shapes and behaviors of plants in nature that makes people feel a sense of calm. Not only that – it looks absolutely beautiful in photos.
I love to encourage ALL of my wedding clients to aim for a more timeless direction because not only do people connect with these more peaceful, natural designs in a positive way, I know that my couple’s memories and photos from their wedding day are ones that they will refer to and look back on for years to come. So I want to make sure that I am designing something for them that is going to outlive any trend and truly withstand the test of time.
Here are some tips on how you can achieve a more timeless garden look in your floral installations.
1. Creating Dimension
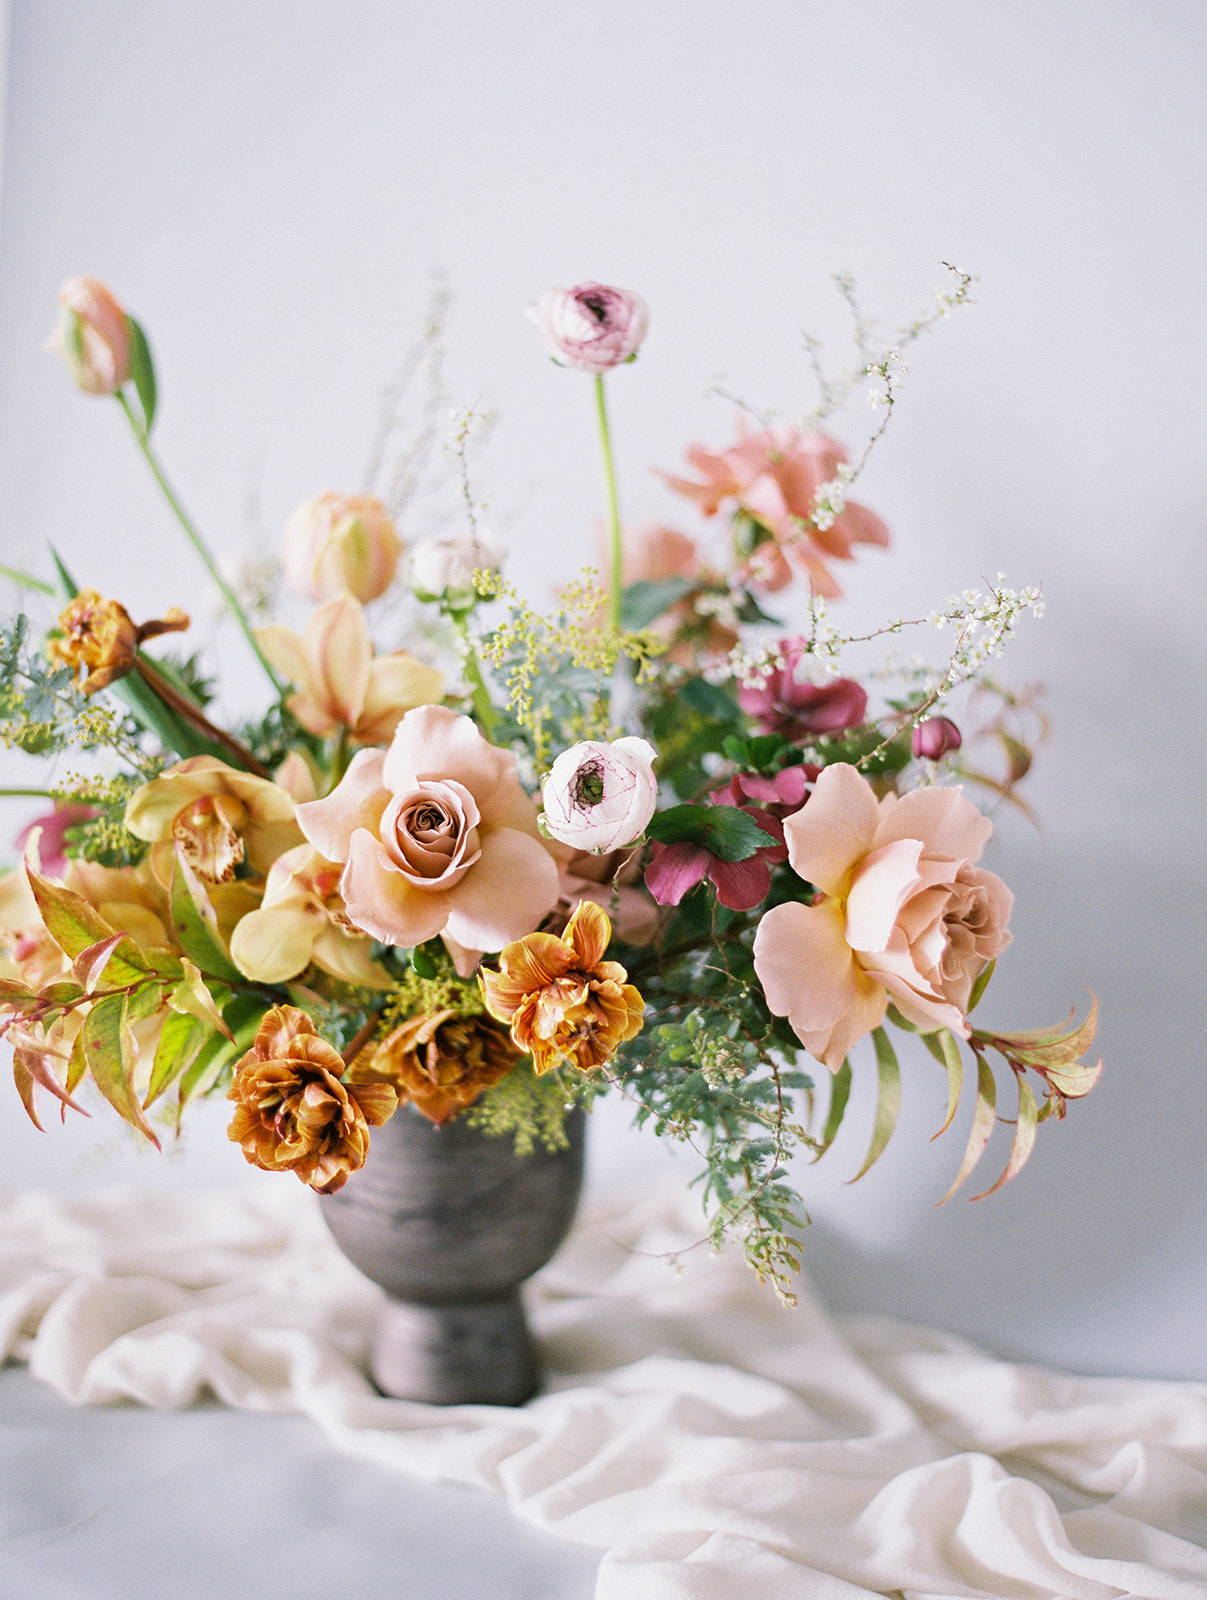
The most basic way to create dimension in a floral arrangement is through varied stem lengths. You want to place flowers on different planes so that instead of being flat and one-dimensional, there is depth and movement. In other words, placing one rose in an arrangement that is close to the base, and leaving the second rose with a longer stem allowing it to stick out a few inches further, will create that dimension.
With large scale installations, you have to think BIGGER when it comes to creating depth and dimension. This depth that you create between stems needs to be heavily exaggerated in order for it to be visible and noticeable from a distance.
…Why is that?
Depth shrinks and becomes almost visibly nonexistent when you are viewing a piece from further away. Imagine you are looking at two trees beside each other, but one is slightly further in front of the other. When you’re close to these trees, you can see that they are on different horizontal planes. But if you were to stand back 20 feet, it would appear that those trees are sitting right beside each other. This is because our eye cannot determine very shallow depth from a distance. When you are standing 20-feet away from a floral installation, the depth between objects shrinks. So you have to exaggerate your stem lengths if you want to create true depth in an arrangement. The larger the installation (and the greater the distance from which it will be viewed and photographed) The longer your most forward-placed stems need to be in order to make an impact.
2. Creating Shape
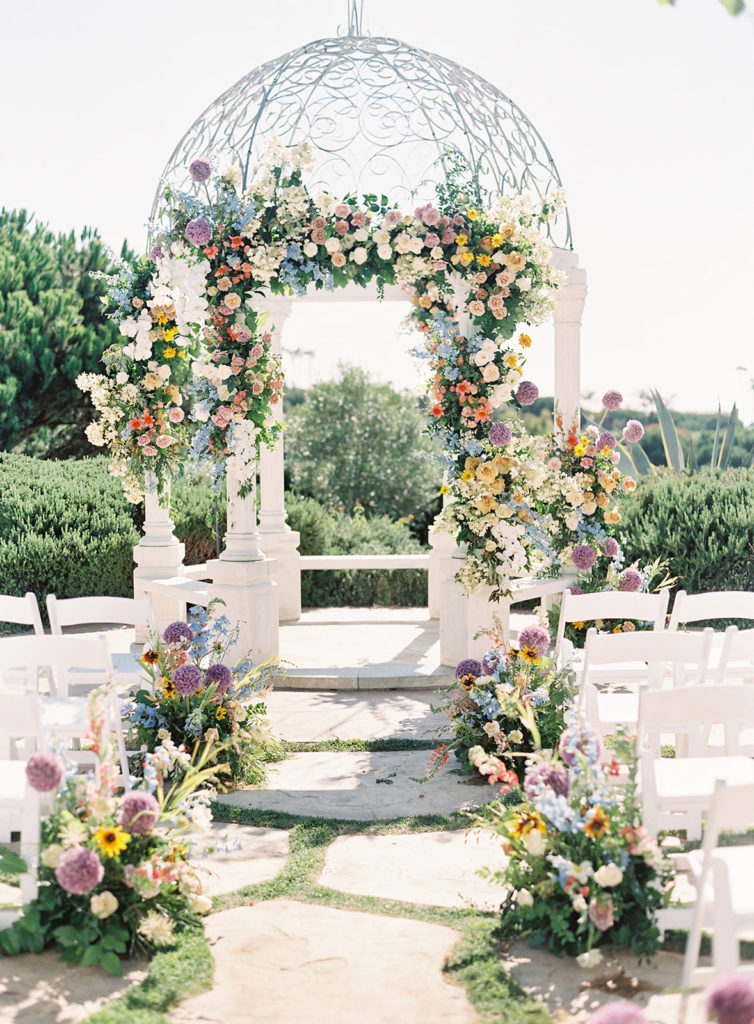
The same rule applies with creating shape – you want to think exaggerated. Because you are viewing a piece from further away, small variances in placement or minor changes in the outline of your arch will not be impactful from a distance. Instead, you want to create DRAMATIC deviances from the central line. Take a look at the arch below, for example, which was created using Oasis cages. Some of the cages were placed along the main beam. Others were placed on the beam above it in order to create exaggerated movement. This “up and down” effect creates a much more visually enticing piece than if the cages were to all be placed along the main beam in a straight line.
You can help yourself from the start by creating an “outline” of your shape through thoughtful placement of your mechanics. Think about where you would like the main focal points to be (using the below arch as an example, I knew I wanted heavy floral in both corners, so we placed our first two cages there and then built inward and outward from those points.
After placing my cages where I want them, I then like to green them out with a base layer of foliage so that I can see an outline of my design. Then I go into the focal areas (or heavily greened areas) and add my blooms to build out those focal points.
Here’s another example of how you can create shape in your design through the placement of your mechanics. For this fireplace, we had a vision of blooms growing around the fireplace. However, instead of following the straight lines of the fireplace, we created curved lines through our cage placement. By placing the two side cages cages slightly wider, and the lower cages slightly inward, we created a much more rounded and dramatized shape.
2. Grouping & Negative Space
The methodology in which you place your florals also has a huge impact on overall shape and movement. Placing blooms evenly spread out throughout a piece can make the design appear stagnant. Even if you are doing the most to create overall shape in your design with your mechanics and base greenery, if you place the blooms sporadically in a “Polka dot” manner, this can distract and take away from the shapes that you’ve created.
Instead, you want to support the shape and flow of the design by adding blooms in heavy clusters or groupings, and crating a “pathway” effect through your design. Allow your blooms placements to guide the viewer’s eye along the shape of the piece like a winding maze, creating for a more effortless viewing experience.
I also like to leave moments of negative space to give the eye a rest. Instead of continuous florals, creating resting points within your design will not only add to the natural appearance of your floral placements but can help gracefully guide the viewer’s eye from one moment to the next, contributing to the overall flow.
Grouping and transitioning between color tones can also help create a more visually peaceful design.
4. Embrace unusual, organic and naturally occurring shapes
Nature is full of imperfections. Learning to embrace imperfection and use it intentionally in your designs can make for a much more unique and charming final result. We relate to pieces better when they have a naturally occurring sense of movement. I always aim for this and try not to overthink my designs too much. Allow the flowers to speak freely. After all, they are at the very heart of why we love what we do!
Want to Transform & Elevate Your Floral Designs & Attract Your Dream Wedding Clients?


add a comment
+ COMMENTS